As in Previous post i have explain you about the Basic’s of Android Programming, its installation and tutorial of simple “Hello world” program . That post includes the following points:
- What is Android Programming?
- From Where to start the Android Programming?
- Tool needed to begin the Android Programming.!
- Installation Instruction of those tools.
- Simple “hello world” Example..!!
If you missed that post then Read: Android Programming Basics
Now in this post we moving ahead from the console level to GUI and i am going to post a tutorial about simple GUI term called as “BUTTON”.
Step 1: Create a Android Project.
Well i don’t think i need to put more words on this that how to create a Android Project. If you have already know then open the Android IDE or Eclipse if you are using then. Give a name of Project and once done move to next step.
Step2: How to manage Button control in Android.
The Android SDK includes two simple button controls for use within your program:
- Button (android.widget.Button)
- ImageButton (android.widget.ImageButton)
The basic difference between them is that the ImageButton support the image on the button rather than following only text as Button Control do.
To add a Button on your code just drag and copy the code and rest you know…..!!!!!
<pre name=”code” class=”xml”><?xml version=”1.0″ encoding=”utf-8″?>
<RelativeLayout
xmlns:android=”http://schemas.android.com/apk/res/android”
android:layout_width=”fill_parent”
android:layout_height=”fill_parent”
android:gravity=”center”>
<Button
android:id=”@+id/Button01″
android:layout_width=”wrap_content”
android:layout_height=”wrap_content”
android:text=”@string/hello”
android:minHeight=”92dp”
android:textSize=”22dp”
android:onClick=”onMyButtonClick”></Button>
<ImageButton
android:layout_width=”wrap_content”
android:layout_height=”wrap_content”
android:src=”@drawable/skater”
android:id=”@+id/ImageButton01″
android:layout_toRightOf=”@+id/Button01″></ImageButton>
</RelativeLayout>
</pre>
Step4: Running the code.
Once you done the copy paste then run the code for desired output.
Read: How to run a Android Code.
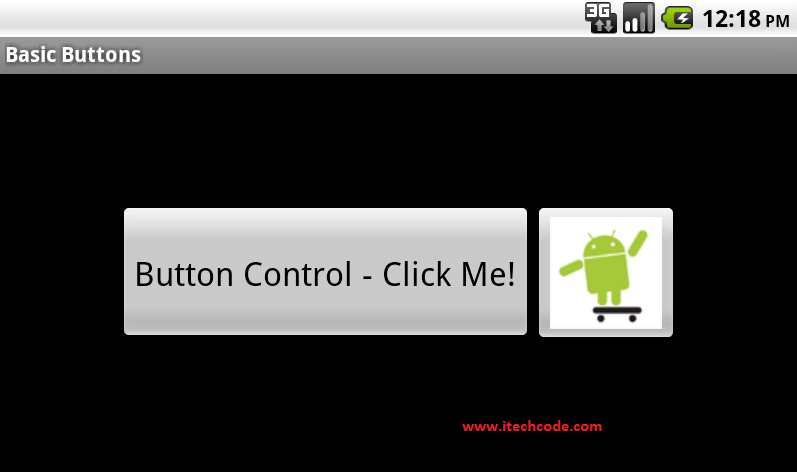
Once you run the code you will see the output like this.
Congratulation you have successfully run the program.
This is all for just adding a button. Do practice guys soon you all will get the next part of Android Programming which is as Layout Management and Handling event.
Till then good bye.
Happy Programming…!!!

being into a programming field since last 7 years i know the importance of coding!
This post is surely gonna help :0
This comment was made by my friend. lolz. 😛
Means?
I am not into programming. I asked my nephew to make some comments as I had some work. Hope you got what I am saying.
And why aren’t you online??