Hello Everyone as in last post i just gave the basic of programming a kernel with some theoretical and graphical description that i am sure helps you out to at least basic understanding of kernel and its programming. If you missed that article then don’t worry click here to read that post.
Lets move ahead, Before moving to programming section i just want to focus on point that we are doing our kernel programming practices on Linux kernel because it is open source and easy to code so the programmer won’t face any difficulties while coding and debugging the kernel.
First of all you need to install a Linux and i prefer install a latest version of Ubuntu or there is many distribution around over net but for beginners and home user Ubuntu is best. If you already have Linux then move ahead.
Note: If you don’t want a DualBoot system and want to use only your primary then i prefer to use the Virtual Machine like virtual box, Vmware and if you are not familiar with them the click here for “installation and setup of virtual machines“.
If you find any difficulty while downloading and installing Linux i.e. Ubuntu Linux then click here to read the “installation and setup of Ubuntu” post.
Now As if you have Linux and i think you are little familiar with “terminal” Then start the programming steps:
Step1: Download the Latest Version of source code [Free]
To edit and compile the kernel we need a source code of kernel and to get the latest version directly please click here or do it manually given below in steps.
Remember this file is come with extension .tar.bz so you have to extract it, Alternative method for this is to open terminal from System->Terminal and type following commands one by one.
$ cd /tmp
$ wget http://www.kernel.org/pub/linux/kernel/v2.6/linux-3.1.0.tar.bz2
Note: If you want the copy paste the do it one by one not the whole at once 🙂 because both are different commands.
Step2:Extract the source file.
As i told we get the package in .tar.bz format so have to extract it, we can do it as simple by clicking right button of mouse on the package and selecting the extract option else by commands…..your choice………!!!
# tar -xjvf linux-3.1.0.tar.bz2 -C /usr/src
# cd /usr/src
Step3: Configuring Kernel and compiling
Well now we are on programming step so before this make sure you have following things on your system.
- Gcc latest version,
- ncurses development package.
If you don’t have them then download it and install it.
Type following for the Gcc:
$ sudo apt-get install gcc
Type this for ncurses development tool:
$ sudo apt-get install libncurses5-dev
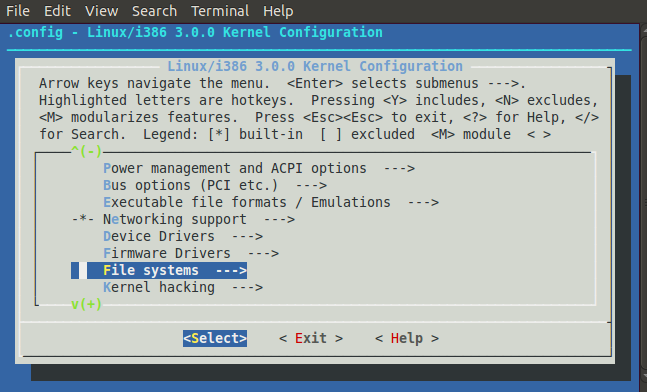
To configure a kernel there is three basic commands for general modifications:
- $ make menuconfig
- $ make xconfig
- $ make gconfig
- System.map-3.1.0
- vmlinuz-3.1.0
- initrd.img-3.1.0
- config-3.1.0


Thanks for this article. Your blog is looking good and i like the contents in it 🙂